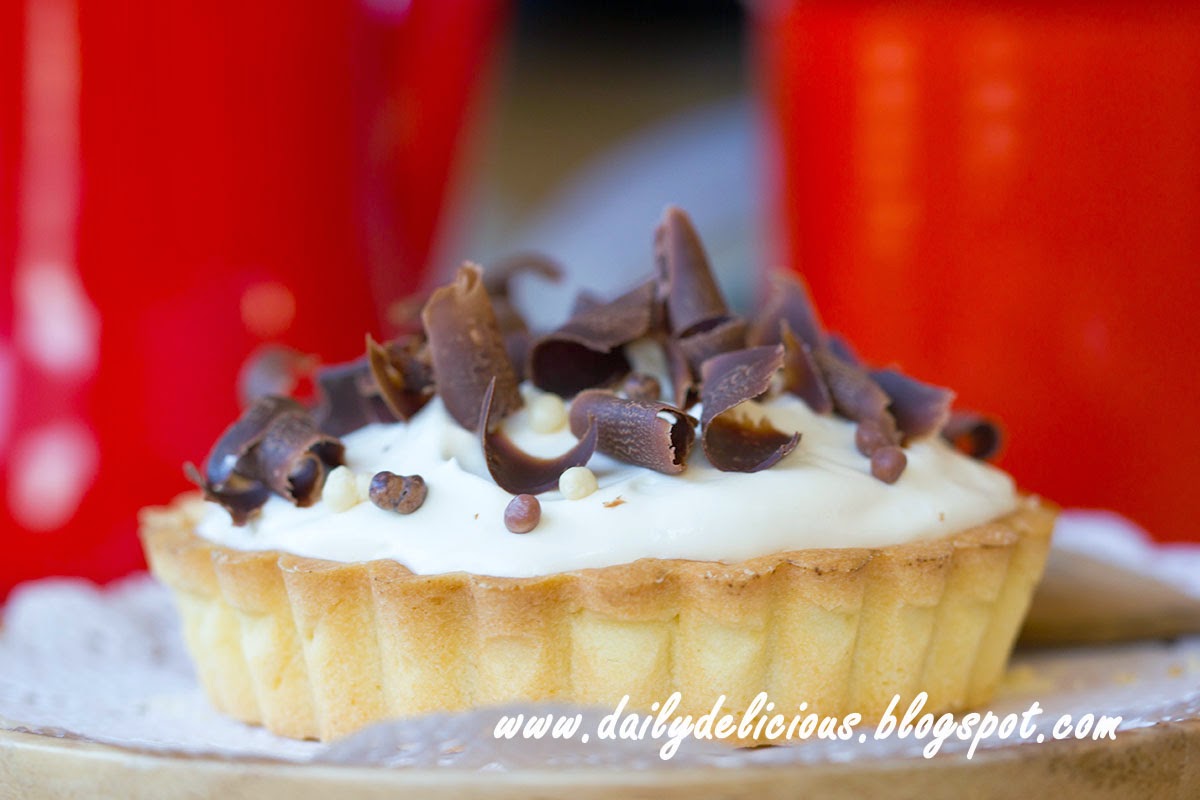
Individual Banana cream pie

I saw these bananas on the table for 2 days now, ^^, and I really wanted to make something from them.
 
Banana cream pie is always be my family's favourite dessert, soft and creamy custard with sweetened whipped and a delicious taste from the banana, you can be sure it's a real hit!
 It's easy to make,  (esp. if you use the same Pâte sucrée (sweet shortcrust pastry) Basic recipe as mine).
Serve it cool with a cup of tea is recommended, and believe me everyone can finish this little pie in one sitting, hehe.

 Individual Banana cream pie 
Makes 4-6 9cm pies (depend on the depth of your pie pan)


Crust
half recipe of Pâte sucrée (sweet shortcrust pastry) Basic recipe, fully baked

Filling

1 1/2 cup ........................... Milk
45g .................................... Granulated sugar
1tbsp ................................. Cornstarch
2 ........................................ Egg yolks
........................................... Pinch of salt
3.5g ................................... Gelatine sheets (about 2 sheets)
1/2tsp ................................ Vanilla extract
1/2tsp ................................ Vanilla bean paste (optional)
1/2cup ............................... Whipping cream
2-3 ..................................... Ripe banana, cut into pieces

Topping

1/2 cup .............................. Whipping cream 
1/2tsp ................................ Vanilla extract
1tbsp ................................. Granulated sugar
........................................... Dark chocolate curls 


 Bloom the gelatine sheets in ice cold water.


 Put the egg yolks, salt, sugar and cornstarch into a saucepan, whisk to combine.


 Heat the milk by putting it in a microwavable jug and heat for 2-3 minutes until boiled.
Slowly pour hot milk into the saucepan, whisk all the time.
Place the saucepan over low heat, whisk all the time, until boiled,


 Remove from the heat, squeeze the water from the gelatine sheets, and put the gelatine into the saucepan. stir until melt.
 Pour the custard into a bowl, and place the plastic wrap directly on the custard, let the custard cool before using.
 When the custard is ready, whip the whipping until soft peaks formed.


 Fold the whipped cream into the custard, in 2-3 additions.
 Fold until smooth.
 Place the banana pieces into the baked crust.
Spoon the custard filling over the banana pieces.
Refrigerate at least 4 hours before serving.
Whip the whipping cream with vanilla extract and granulated sugar until firm peaks formed.
Spoon the whipped cream over the custard and decorate with chocolate curls.


Individual Banana cream pie 

Pâte sucrée (sweet shortcrust pastry) Basic recipe


With food processor, this sweet shortcrust pastry is very easy to make. You can make and bake an empty crust for using it in many recipe.

Pâte sucrée (sweet shortcrust pastry) Basic recipe

250g ......................... Cake flour
150g ......................... Unsalted butter, cold cut into pieces
100g ......................... Icing sugar 
2 ............................... Egg yolks
15g ........................... Milk
.................................. Pinch of salt 


 Put flour, butter and pinch of salt into a bowl of food processor.
 Process until fine, add icing sugar.
 Process until combine, then add egg yolks.
 Process until moisten, then add the milk.
 Process until dough formed.
 Remove from the bowl and gently knead until smooth.
Cover with plastic wrap, refrigerate at least 1 hour before using.


Basic Baking tip for empty crust.

Line the tart or pie pan with pastry, then pierce with fork.
Line the dough with parchment paper.
Fill the lined pastry shell with baking beans.

For Large pie crust: Bake in 180C preheat oven for 15 minutes. Carefully remove the paper and beans and continue baking until golden, 15-20 minutes.
For Individual pie crust: Bake in 180C preheat oven for 10 minutes. Carefully remove the paper and beans and continue baking until golden, 10-15 minutes.


Red berry Macarons

I was busy lately, you can see that I don't have time to post recipes (or reply e-mails, if you send me, haha).

I still bake and cook everyday, but there're nothing new or sometimes I just didn't have a chance to take a photo -*- . Playing in the kitchen is fun, but too much can make you feel tried, haha.
But I can't go away from this place, so I keep feeling tried from baking and eating ^^.
Today I just want to make red color macarons (it's the only reason for me), but I just can't find the super red food coloring so my red macaron is deep pink than real red. The filling for this macaron is super easy, I use basic one egg buttercream with berry preserves, you can use many kinds of berry, I use half raspberry preserves and half strawberry preserves.


Red berry Macarons 
Makes 32-34 pairs 

macaron
90g ................................ Almond powder*
135g ................................ Icing sugar
75g ................................. Egg whites 
2g ................................... Egg white powder (optional)
50g ................................. Granulated sugar
......................................... Red food coloring

Berry buttercream
25ml .............................. Water
80g ................................ Granulate sugar
15g ................................. Cocoa butter*
1 ..................................... Egg
125g ............................... Unsalted butter
60g ................................ Berry preserves  
......................................... A pinch of salt

*If grinding your own nuts, combine nuts and icing sugar in the bowl of a food processor and grind until nuts are very fine and powdery.
*If using white chocolate, use 30g of white chocolate and reduce the sugar to 70g

Sift together the almond powder and icing sugar.

 Mix the egg white powder with granulated sugar. 
Beat the egg whites in the clean dry bowl.
Slowly add the granulated sugar mixture, red food coloring, and whip to combine. 

 Beat until the mixture holds soft peaks.
 Add 1/3 of the almond flour mixture into the meringue and fold to combine. 
Add  in the remaining almond flour in two batches. Don’t overfold, but fully incorporate your ingredients.
 Spoon the mixture into a pastry bag fitted with a plain half-inch tip (Ateco #806).

  Pipe 3.5 cm rounds onto baking sheets lined with nonstick liners (or parchment paper).


Decorate half of the macaron shells with white dragree. 
When you’ve pipe out all the macarons lift each baking sheet with both hands and then bang it down on the counter (you need to get the air out of the batter), place the rose tea petals on top of half of the macarons.
Set aside for 1 hour. After 1 hour the top of the macarons will be dry, and ready to bake.
Preheat oven to 160°C. Bake for 12 minutes (baking time can be varied, from 12-15 up to your oven) or until firm to the touch. Remove from oven and cool on trays. Slide a knife under each macaroon to release from paper. Store in an airtight container for up to 1 week or until ready to assemble.
  In a sauce pan, put the sugar and water and bring to boil over medium low heat.
 When the syrup reaches 100°C, start whisking the egg.

The syrup is ready when it reaches 115°C; pour it over the egg  and continue whisking until cold.
 Add the salt the cocoa butter, and beat to combine.
 When the mixture cool to 34C . Add the butter  Increase the mixer speed to high for 1 to 2 minutes, or until the butter is fully incorporate.
 Beat until smooth.

 Add the berry preserves into the bowl and beat until combine.

Sandwich the macaron shells with the Lemon buttercream, refrigerate until set before serving.
Red berry Macarons 

Beurre Noisette and Vanilla Bean cake

I love simple cake, the one that you can bake it with no time, esp. delicious one ^^.
Pound cake is in this category too, it's easy and delicious plus you can turn it into endless different flavours. Change the sugar, add the extract or fruits, there are many ways you can do. This time, we turn simple pound cake into special one, by turning butter into Beurre Noisette. Beurre Noisette is made by melt the butter and heat until milk segment in the butter become brown, the smell of Beurre Noisette will be nutty (be careful when making Beurre Noisette, remove the saucepan from the heat before it become burn). 
You can serve it the day it made or let it cool and warp with plastic to let it mature for 1 night the texture of the cake will become moist and more delicious.


Beurre Noisette and Vanilla Bean cake
Makes 8 (using 6x9cm mini loaf pan)


130g ................................. Unsalted butter
120g ................................. Cake flour
120g ................................. All purpose flour
1 1/2tsp ............................. Baking powder
1/4 tsp ............................. Salt
250g ............................... Granulated sugar
1 ..................................... Vanilla bean 
1tsp ................................ Vanilla extract
4 ..................................... Eggs
100ml ............................... Whipping cream
2tbsp ............................... Dark rum

Preheat the oven to 180C.
Sift both of the flour together with baking powder and salt.

Put butter in saucepan, place over low heat, heat until melt and turn to golden, milk segments will turn into brown color, and has nutty smell.
Remove from the heat and let it cool.
Brush the pan with butter and sprinkle with flour, set aside.
Put the sugar into a bowl with seeds from vanilla beans, rub them together.
Put the eggs into the bowl, whisk to combine, then put the vanilla extract into the bowl.

Pour the whipping cream and rum into the bowl, whisk to combine.


Pour the dry ingredients into the bowl, fold to combine.

Fold in the Beurre Noisette in 3 additions.

Fold until smooth.
Pour into the prepared pan, bake for 25-30 minutes or until the top of the cake spring back when press lightly.

Beurre Noisette and Vanilla Bean cake